A safe, secure way to drill oddly shaped parts
By Helen I. Driggs

Teachers are always on the lookout for safe ways to help their students accomplish potentially dangerous studio tasks involving power equipment, such as polishing, grinding, and drilling. This easy-to-make drilling block helps to hold small, sharp metal parts of any shape or gauge securely. It also has an added bonus—no more “swiss cheese” bench pin!
For this project, you’ll need a scrap of hardwood, a 1/2-inch wood dowel, a 1/2-inch (or smaller) drill bit for wood, a separating disc attachment (or jeweler’s saw with a coarse blade), a round wood rasp, a circle template, and a marker.

1. Mark a 1/2-inch circle in the center of the wood scrap (I used a 1 x 3 x 6-inch section of red oak).

2. Drill a hole all the way through the wood block. (I didn’t have a 1/2-inch drill bit, so I used a 3/8—the largest one I had on hand.)
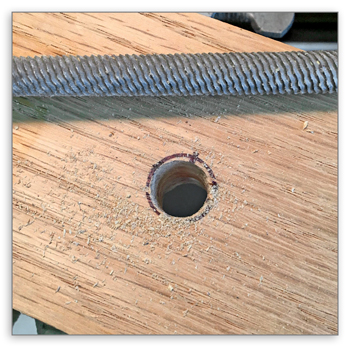
3. Use the wood rasp to enlarge and refine the drilled hole, ensuring the dowel will insert snugly and can be inserted and re-moved easily.

4. Insert the dowel in the wood block until it touches the bench top.
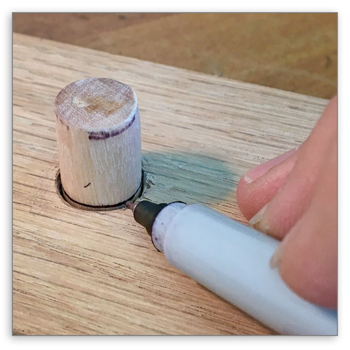
5. Mark a line on the dowel where it exits the hole on the top of the wood block.
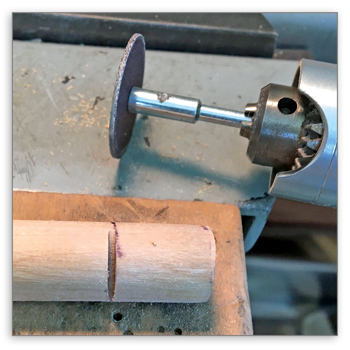
6. Just below the marked line on the dowel, use the separating disc (or a jeweler’s saw) to cut a slot to a depth of about a third of the thickness of the dowel.
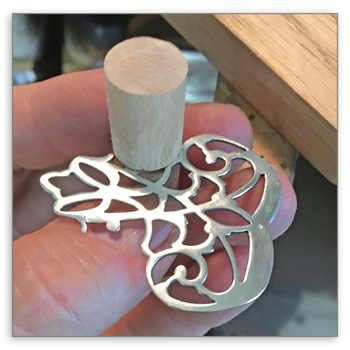
7. To use the clamp, insert the metal part to be drilled into the slot. Insert the dowel into the hole in the block and push down on the dowel until the metal does not move.

8. Drill as needed. This wood-drilling block-and-dowel combo helps to hold metal for precision drilling, is easy to reposition, lasts a long time, is inexpensive and easy to make, and will protect fingers from the potential of spinning or slipping metal parts of any shape or gauge.