A tip for polishing jewelry on the go
By Helen I. Driggs

Because I travel a great deal to teach jewelry classes, I’ve created a travel toolbox that combines a light weight with TSA-friendliness while still enabling me to complete jewelry-making tasks on the fly. When I’m doing demos far from home or when power equipment is unavailable, hand finishing tools and tricks are a way of life. This handy little tool for polishing hard-to-reach spots in jewelry takes up the space of a business card and weighs virtually nothing.

1. To make these polishing strings you’ll need some 100 percent cotton cord, a key ring or other closed metal loop, scissors, and whatever polishing compound you intend to charge the fibers with.

2. Cut four to six lengths of cord, each about 18 inches in length. Fold the group-ed cords in half and insert the looped section into the opening of the key ring.

3. Pass the tails of the cords through the loop in the cords. Pull the tails of the cords tightly to create a lark’s head knot.

4. Hook the key ring onto something that will enable you to pull the tails of the cords taut. The mounting nut on my GRS bench pin makes a perfect place for this.

5. Charge the taut cords evenly with your polishing compound. Here, I used red rouge. Aim for even application of compound and ensure all of the cords are fully loaded along their entire length and circumference.
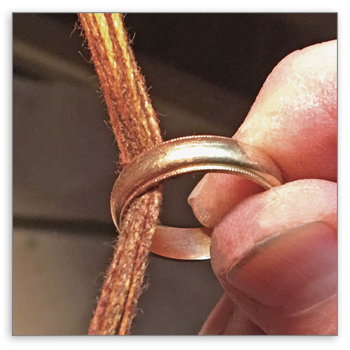
6. To use the polishing cords, mount them on a hook or on your bench pin, slide the jewelry object on them, pull them taut, and then slide the jewelry back and forth on the cords to polish it.

7. For narrow openings, I either use fewer cords or create a tool from thinner gauge cords.
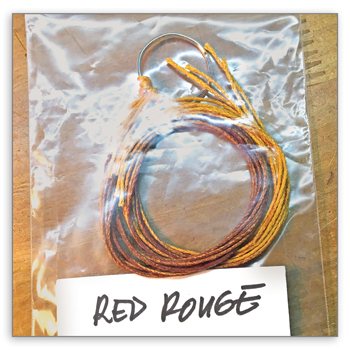
8. To avoid cross-contamination of compounds, and to prevent scratch-inducing dirt and debris from adhering to the tool, store the charged cords in a dedicated Ziplock bag.